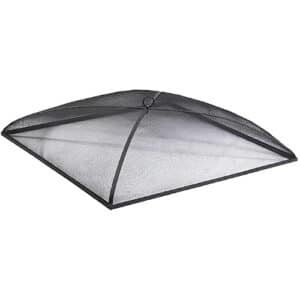
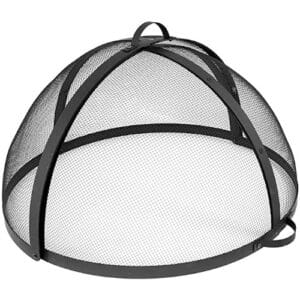
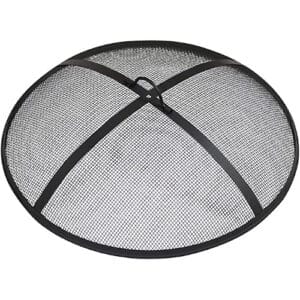
Are you looking for a way to protect your deck from ash and sparks? Or maybe you want a more attractive fire pit screen than what is currently available on the market? This article will guide you through how to make your own custom Fire Pit Screen. It’s easy, it’s cheap, and it looks great!
This post walks users through how they can easily build their own custom fire pit screens that look great and are functional as well.
A fire pit screen is a great way to keep sparks and embers from flying out of the fire, and also can help protect your patio or deck from scorch marks. This guide will show you how to make a fire pit screen using some basic materials that are easy to find at any hardware store.
What is a Fire Pit Screen and what does it do?
A Fire Pit Screen is a metal mesh that encloses the fire pit without obscuring any of its beauty. It provides safety to children and pets while allowing you to enjoy your outdoor fireplace or fire pit year-round, even on windy days. The screen keeps out sparks that could set nearby grasses on fire and also protects homes from embers flying about in high winds.
Here are some tips for making a Fire Pit Screen:
- Measure the top and sides of your fire pit and purchase mesh that is at least an inch higher than the rim.
- The screen should be large enough to cover the opening – including any handles – but not so big as to impede airflow or reduce heat loss from wind currents. – Although there are many styles available, consider choosing one with horizontal wires instead of vertical wires because it will provide more support against high winds.
- Be sure to purchase a screen that does not come with grommets – as they can also pose safety issues.
- Plan the design of your Fire Pit Screen by considering how it will be used and where you might need access points or other features such as handles for moving or cleaning, etc.
Materials needed to make the Fire Pit Screen
- Screen mesh, about two feet by five feet
- Stick or old broom handle to use as a poker for the fire. Any long straight object will work well.
- Pruning shears or wire cutters.
- A drill with a large drill bit, about one half inch or an eighth of an inch larger than your wire.
*If you do not have access to a power tool, find someone who does and ask for assistance!
Please note: these instructions are only valid if the wire is galvanized steel mesh material. Different types of metal will behave differently when heated.
- The first step in making this fire pit screen is to cut out a piece of screen that will fit inside your circular structure. If there happens to be an existing hole through which you can feed it from below then great but otherwise just measure up from the bottom as closely as possible and use shears or pliers (for cutting) to trim along the edge.
- The wire mesh should be just smaller than the opening you are trying to cover up, so that it can fit inside without falling out or being easily pushed through.
- Next take your stick and push it into one of the circular ends at an angle so it sticks straight up from there making a tool for poking things above the fire pit screen later on. This also serves as a handle which will make inserting and removing this new metal shield easier if necessary during use because once hot steel is not easy to touch! Now feed your newly cut piece of wire mesh down through the bottom hole until all but about two inches remains below ground level (this part may need trimming) then bend that last bit over underneath itself in order to make a snug fit with the bottom of your pit.
- At this point you should try to bend one end over until it touches both ground and top side at about 45 degree angles which will help keep things secure if someone accidentally bumps into it or tries to kick dirt up onto the screen (which they inevitably will). If any ends are poking out, use your pliers or shears again to cut them off so they don’t poke anyone later on! Do not be afraid to adjust these pieces after installation because nothing is permanent here. Now take your drill bit and find something flat-ish for drilling upon like an old piece of wood then place that beneath where you want the wire mesh installed before clamping everything down firmly in order to prevent slipping. Drill the wire mesh from below to make a hole through which you can feed your stick/handle. This will be how it is removed later on if needed and also acts as an anchor for holding everything in place while still allowing some flexibility (which helps with removal too).
- Finally, go ahead and install your fire pit screen by pushing any loose ends down into the ground or towards each other so they are fairly flush against one another before dragging that handle back out again. To remove simply pull up on the end of it until all sides come free then bend them over themselves like pulling off pant legs (or socks) would work best here depending upon their shape! Now insert sticks at various points along its length if desired but this isn’t necessary. Also avoid poking the screen itself with the stick because this will cause punctures which are difficult to repair.
The next step in making a fire pit screen is optional but highly recommended for safety purposes so that you can control airflow while also protecting yourself from sparks and embers. To do this cut two pieces of wire mesh which are slightly larger than half your circumference, then fold them over onto themselves at right angles leaving about an inch sticking out on one side attached by only one point (see images below). Now drill through each end into something flat like wood or concrete/cement flooring firmly enough that they stay put without coming loose later on when you need it most!
Hanging these screens your fire should not be too tall unless you have a longer handle or other such tool at the ready to keep it from coming into contact with these screens which can melt and cause them to fall off. This is why we recommend cutting that first screen piece as close as possible because if there’s too much excess then those edges might touch accidentally when someone kicks up some dirt, for example!
Try out your new fire pit screen and enjoy its protective barrier while keeping any little hands safe who may be nearby by accidently (or on purpose) poking things where they shouldn’t go. You should also watch how close you let anyone get to this thing during use because sometimes sparks will still manage their way through regardless of best efforts otherwise even though everything appears fine initially after installation. So don’t be surprised if you notice a few hot spots later on down the road that might need additional attention!
All in all, building your own fire pit screen is not too difficult and can actually add some charm to its appearance while helping keep it functional for longer. There are many options available online so take a look around before deciding upon one or making your own from scratch which isn’t as complicated as it might seem!
Steps for making the Fire Pit Screen
Purchase a piece of plywood. Make sure it measures at least 18 x 24 inches and is half an inch thick. The larger the board, the easier to create your screen. It’s important that you get a sturdy material for this project as well.
Steps for making the Fire Pit Screen:
- Purchase a piece of plywood. Make sure it measures at least 18 x 24 inches and is half an inch thick. The larger the board, the easier to create your screen. It’s important that you get a sturdy material for this project as well.
- Drill holes in the top of your four inch PVC pipes. Measure two inches up from each end, then drill into that spot with a half an inch wide drill bit. This should create small circles on both ends to run wire through. If you don’t have this equipment available for purchase at home improvement stores like Home Depot or Lowes, make sure to borrow it before starting this project.
Steps for making the Fire Pit Screen:
- Drill holes in the top of your four inch PVC pipes. Measure two inches up from each end, then drill into that spot with a half an inch wide drill bit. This should create small circles on both ends to run wire through. If you don’t have this equipment available for purchase at home improvement stores like Home Depot or Lowes, make sure to borrow it before starting this project.
- Run the wire through each of the pvc pipes and tighten them with a wrench. You can then hang your screen on one side of your fire pit as long as there is something heavy enough holding up that end such as concrete blocks or bricks. If you don’t have those materials around either, push some stakes into the ground about half an inch deep and attach another piece of board onto each stake using zip ties to hold everything in place during wind gusts so no material blows away while burning wood underneath it!
Steps for making the Fire Pit Screen:
- Run the wire through each of the pvc pipes and tighten them with a wrench. You can then hang your screen on one side of your fire pit as long as there is something heavy enough holding up that end such as concrete blocks or bricks. If you don’t have those materials around either, push some stakes into the ground about half an inch deep and attach another piece of board onto each stake using zip ties to hold everything in place during wind gusts so no material blows away while burning wood underneath it!
- Measure four inches from where the screen meets the bottom edge of the plywood frame. From this spot, measure down 18 inches along both sides to create two small rectangles in order to thread wire through for hanging purposes when the screen is not in use.
Steps for making the Fire Pit Screen:
- Measure four inches from where the screen meets the bottom edge of the plywood frame. From this spot, measure down 18 inches along both sides to create two small rectangles in order to thread wire through for hanging purposes when the screen is not in use.
- To make your life easier while assembling all of these pieces together, drill holes at an angle on either side inside each rectangle until you get halfway up your two inch wide PVC pipe (it should be sticking out about one inch). Then attach them using zip ties or even duct tape! This will help keep everything secure and prevent any accidents during assembly time!
This way if someone accidentally knocks into this side, the screen won’t fall down and cause any injuries.
Tips for using your new Fire Pit Screen
- Use common sense. You’re responsible for your own safety and that of others around you.
- Make sure the screen is securely attached to its frame, especially if children are nearby; they may be tempted to climb on it or pull themselves up using the frame as a ladder. This could result in injury.
- To ensure successful installation attach all four wall brackets (two included) firmly with screws/bolts (not provided). A power drill will make this task easier, but not required; hand tightening works too!
- Don’t worry about broken tiles! Just vacuum them out when finished.
- Once secured use warm soapy water and scrub brush to clean any remaining debris from gaps between panels then allow time to air dry before using.
- For best results, place your Fire Pit Screen on a flat surface that has plenty of room to accommodate the screen when open and closed. Do not put it in direct contact with flammable objects or surfaces such as wooden decks and grassy areas since heat may be transferred through the frame onto combustible materials nearby.
Environmental Protection
The main materials used for fire pit screens are metal, aluminum or steel. They can be recycled and reused to reduce the use of new resources which is good for environmental protection.
Safety Tips
- Making a fire pit screen is not only fun, but also safe. Before you start building your own fire pit screen, there are some safety tips that you need to be aware of. The first thing that you have to do is protect yourself against the sparks and embers that can fly out of the fire even when it’s properly covered by an existing barrier. Make sure to purchase a spark arrestor with mesh size at least 16 gauge for best results as smaller sized screens can ignite quickly in extreme heat conditions which may cause damage or injury on its surroundings.
- When buying your metal sheeting material, make sure it has minimal corrugations so water won’t build up inside them causing rusting problems later on down the road.
- Avoid using screws to secure the metal sheet. This will make it more difficult for you if you need to replace or repair a damaged part of your screen at some point in time. Use rivets instead as they are easier to assemble and remove without leaving any unsightly holes on the surface of your fire pit table later on down the road.
- When designing your fire pit screen, make sure that you leave enough room for the smoke and sparks to escape. This will not only keep your guests from being burned by these hot embers later on down the road but also ensure a safe environment while having fun at the same time.
- The more airtight it is, the better off you’ll be when using your new fire pit screen in windy conditions as this might cause trouble with normal screens which have gaps between them where unwanted elements can fly inside of them causing damage or injury on its surroundings. Always take caution whenever making fires outside so everyone stays out of harm’s way!
FAQs
Can I use this screen on any size pit?
Yes! It’s easy to adjust the shape of our Fire Pit Screen, so you can place it over almost any fire pit. You will find in your package detailed instructions with measurements for each configuration.
Can I leave Fire Pit Screen in the rain?
The material is strong and resistant to water, so you can keep your screen outside. However, if you want a long term solution we recommend covering when not using the fire pit.
What if I don't have a drill or screws? Can I use stones instead?
This screen is designed specifically not just to be functional but also ornamental, that's why we recommend using screws because they are easier than making holes on stone which can damage the surface.
Conclusion
Making a fire pit screen is easy and fun to do. It can be used in many different ways such as camping, beach activities, backyard bonfires and much more. Try it out for yourself!


